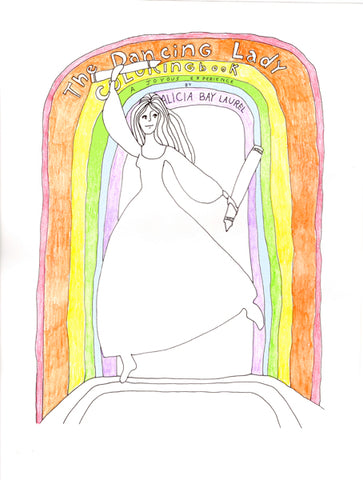
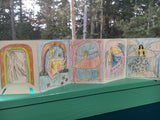
A dozen of Alicia's 1970s drawings of dancing women printed on a accordion-folded strip of heavy white drawing paper by a Japanese printing company.
Size (folded): 108mm × 140mm (4 1/4 inches x 5 1/2 inches). It's small enough to send as a gift in a greeting card envelope, carry in a purse, and deploy whenever a sweet and gentle distraction is needed.
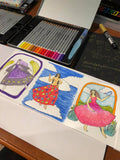
After the drawings are colored, the unfolded book can be displayed on a wall or standing on a table top. Children and adults can enjoy coloring these drawings.
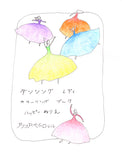
The English language color cover is on the left end of the strip (since books in English are read left to right), and the Japanese language color cover is on the right end of the strip (since books in Japanese are read right to left). In between are 10 black and white line drawings to color with crayons or colored pencils.
Alicia realized, in the process of adding color to the Japanese cover, that the four dancing ladies at the top represent the four elements: earth, water, air and fire, and the lady at the bottom of the page is the fifth element, love.
How to turn a Dancing Lady Coloring book into 12 yule tree decorations:
1. With a paper-cutter or trimmer, separate the 12 pages.
2. Color them all any way you like, and write poems or messages on the backs, if you are so moved.
3. Optionally glue on sequins, tiny stickers, lace, yarn, braid, feathers, paper cut-outs, tiny artificial flowers, etc. If you do this step, you might want to coat the card with 2 or 3 layers of ModPodge (a water-based clear coating) on both sides, so the decoupage remains intact over the years. Let each coating of ModPodge dry completely before adding the next.
4. Use a hole-puncher to make a hole at the center of the top of each page, about 3/8 of an inch, or 1/2 centimeter, from the top edge.
5. Thread a length of ribbon, twine, string, or wire through the hole.
6. Optionally add beads to both sides of whatever you threaded through the hole, and then join the ends so it can be looped over a twig of the tree.
7. Please send me photos!

